All New: Evaluations for RAG & Chain applications
NLP: Huggingface Transformers NER, understanding BERT with Galileo


The goal of NER, or named entity recognition, is to figure out which label each word in a phrase belongs to. For example, we might label "Galileo" as a "person" and "Jupiter" as a "location" in the sentence, "Galileo was an Italian astronomer who was born in Pisa, and he found the moons of planet Jupiter."
In machine learning, Hugging Face became one of the leading hubs for pre-trained models and datasets. Especially in Natural Language Processing providing end to end pipeline for text classification, fine-tuning, and much more. In fine-tuning the quality of your data is significant. So in NER if you label is mislabelled, no matter what architecture you choose, the model learns the wrong classification.
How can you find mistakes and problems with the quality of your data? In this article, you will learn how to leverage data quality analysis provided by Galileo.
You will learn how to:
- Load a dataset from HuggingFace into your environment and preprocess it
- Connect with Galileo and log your samples
- How to use Galileo to gain insights about the data quality during training.
- Inspect your data, and find mislabeled samples from the Galileo console.
About the Dataset
CoNLLpp is a corrected version of the CoNLL2003 NER dataset, where labels for 5.38% of the sentences in the test set have been manually corrected. The training set and development set from CoNLL2003 are included for completeness.
Check out the dataset card for more information.
Install `dataquality`
For this tutorial, you need atleast Python 3.7. As a development environment, you can use Google Colaboratory for example. For the datasets and pretrained models, install transformers, datasets and evaluate. To install Galileo, run pip install dataquality.
1
2# Install HF datasets for downloading the example datasets
3!pip install -U dataquality datasets evaluate transformers &> /dev/null
4
5print('👋 Installed necessary libraries and restarting runtime! This should only need to happen once.')
6print('🙏 Continue with the rest of the notebook or hit "Run All" again!')
7
Import `dataquality` and initialize Galileo
First import the `dataquality` library and make sure you signed up, to get an API token that would let you create a project and send data to Galileo.
1import dataquality as dqNow we create a new run and project. Specify the task type (you can see a list of valid options by running `dq.schemas.task_type.TaskType`).
Each run will go under the project folder you have specified. In this case, the project folder will be `named_entity_recognition_conllpp`, and you can initialize different runs under this project. Ensure you also provide a name for your run. Otherwise, random names will be generated:
1dq.init(task_type="text_ner",
2        project_name="named_entity_recognition_conllpp",
3        run_name=f"demo_run_conllpp_01")
You should see a similar output:


Load HuggingFace 🤗Dataset
Galileo makes it possible to find insights and mistakes in your training dataset in minutes, not days. You can now confidently ditch Excel sheets and ad hoc Python scripts, mitigating the cumbersome detective work of exploratory dataset analysis.
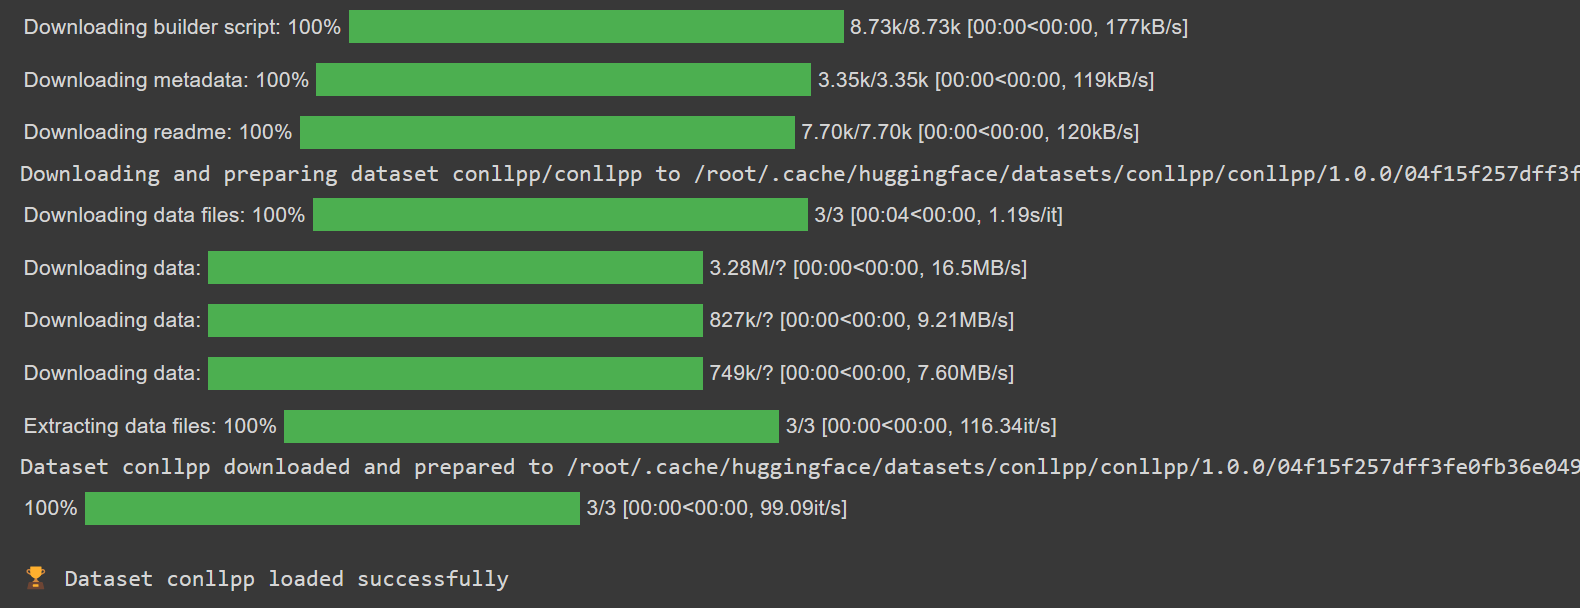
Select any HuggingFace dataset from this page that contains training, validation, and test splits and a `ner_tags` column. In this demo, you will use the popular `conllpp` dataset. You will also assert that the dataset has training, validation, and test splits. To make the test set simpler to work with, you will also minimize the amount:
1from datasets import load_dataset
2
3# Load the HuggingFace dataset you want to use for NER
4dataset_name = "conllpp"
5dataset = load_dataset(dataset_name)
6assert {"train", "validation", "test"}.issubset(dataset), \
7f"💾 The dataset {dataset_name} does not have train/validation splits. Please pick another one."
8
9print(f"\n🏆 Dataset {dataset_name} loaded successfully")
10
You should see a similar output:

Tokenize and Log Dataset
Galileo provides HuggingFace integrations to allow tokenization, and label alignment while automatically logging your input data. Additionally, you can also use the `get_dataloader` function instead of PyTorch's native `DataLoader` or TensorFlow’s tf.data API to automatically create a `Dataset` class and prepare a dataset loader for each split.
Make sure to store the names of your labels so that Galileo can map your integers to real labels when it analyzes your data. The model you will use in this demo is the RoBERTa base model you can find on HuggingFace.
Here is how to import and use this model to get the features of a given text in PyTorch:
1from dataquality.integrations import hf
2from transformers import AutoTokenizer
3
4tokenizer = AutoTokenizer.from_pretrained('roberta-base', add_prefix_space=True)
5
6# 🔭🌕 Galileo tokenizes the HuggingFace DatasetDict logs the dataset(s) present in it
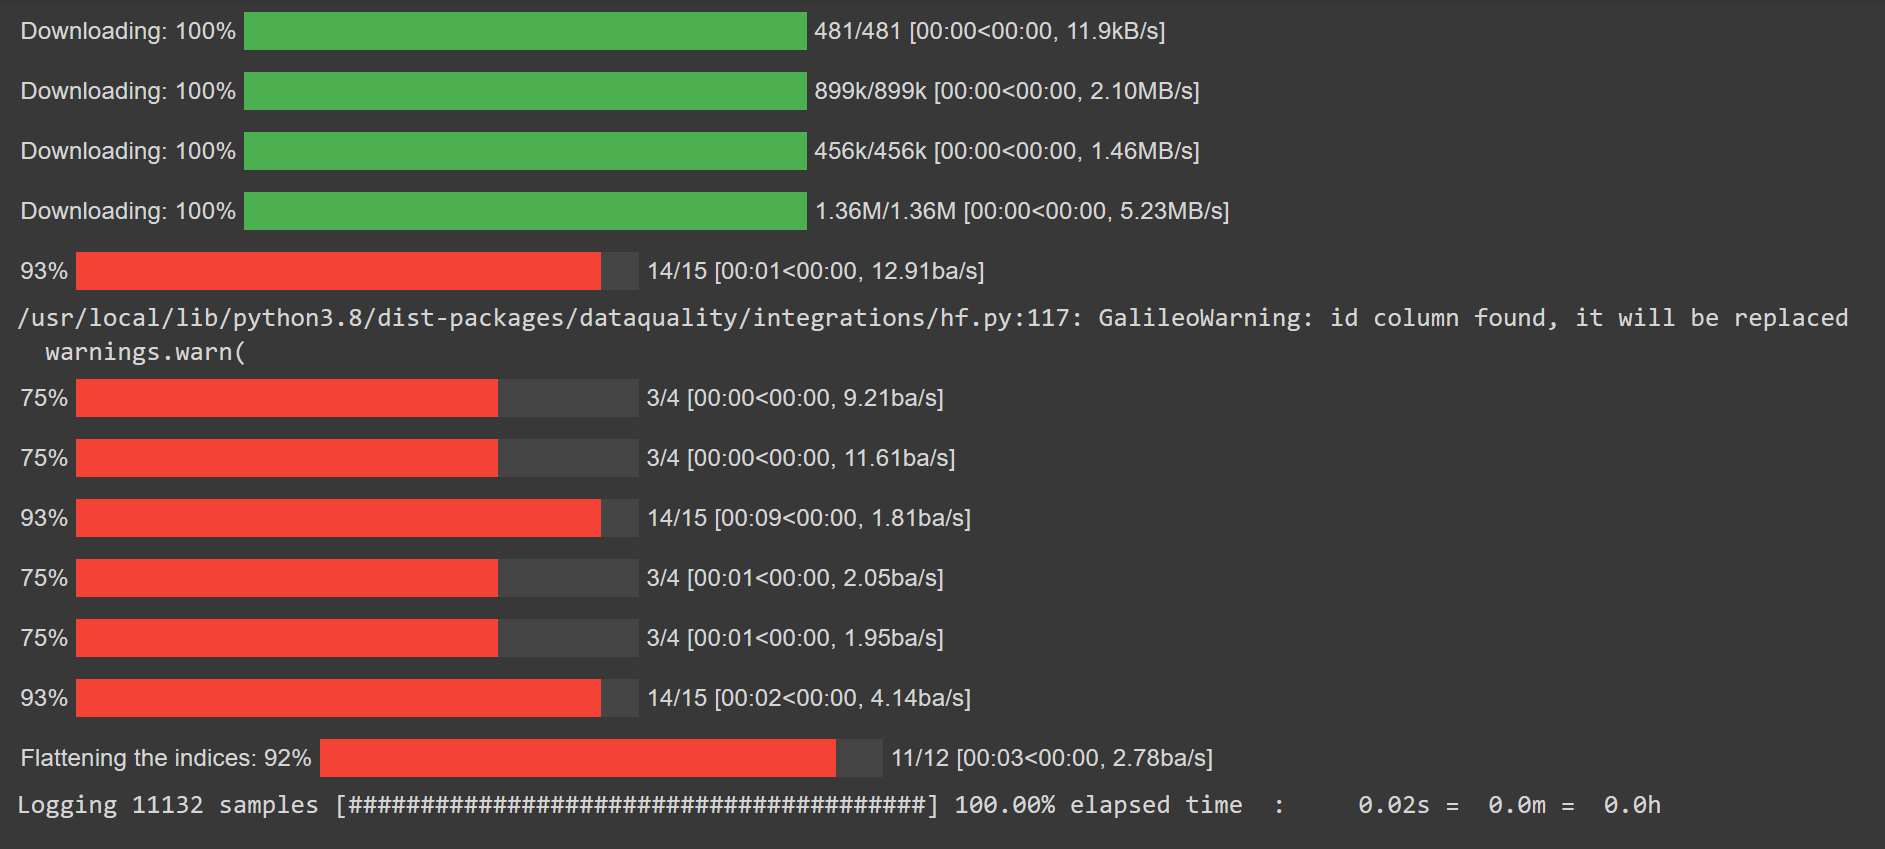
7tokenized_datasets = hf.tokenize_and_log_dataset(dataset, tokenizer)
8labels = tokenized_datasets['train'].features['ner_tags'].feature.names

Prepare and Log NER Model to Galileo
After tokenizing the dataset, you will get more inputs than labels because some words might have been split into several tokens. You’d need to use the word IDs provided by the tokenizer to match each token to the word it belongs to.
That way, you’d be able to match each token to the word it belongs to, allowing you to match each token to its corresponding label:
1from transformers import (AutoModelForTokenClassification, DataCollatorForTokenClassification,
2                          Trainer, TrainingArguments)
3from datasets import load_dataset, load_metric
4
5task = "ner"
6label_list = dataset['train'].features['ner_tags'].feature.names
7id2label = {idx:label for idx, label in enumerate(label_list)}
8label2id = {label:idx for idx, label in id2label.items()}
9label_all_token = True
Unless you change your preprocessing function to apply some fixed padding, you’d likely get sentences of various lengths in your dataset, so you’d need a way to batch inputs together. One way to do this is to pad the inputs and labels to the same length. HuggingFace has a dedicated `DataCollatorForTokenClassification()` module that expects a list of `dicts`, with each `dict` representing a single example in the dataset.
To evaluate the model's performance, use the `seqeval` metric, which produces labeling scores and sufficient statistics from a source against one or more references.
This demo fine-tunes the RoBERTa base model on the tokinized dataset, but you can select any model you want from the HuggingFace model hub:
1data_collator = DataCollatorForTokenClassification(tokenizer)
2metric = load_metric('seqeval')
3model = AutoModelForTokenClassification.from_pretrained('roberta-base', num_labels=len(label_list), id2label=id2label, label2id=label2id, finetuning_task=task)
4batch_size = 10 # choose a reasonable batch size
Define a function to compute the metrics given that the `seqeval` metric we define earlier returns a dictionary with a summary of performance scores:
1def compute_metrics(p):
2    predictions, labels = p
3    predictions = predictions.argmax(axis=2)
4
5    # Remove ignored index (special tokens)
6    true_predictions = [
7        [label_list[p] for (p, l) in zip(prediction, label) if l != -100]
8        for prediction, label in zip(predictions, labels)
9    ]
10    true_labels = [
11        [label_list[l] for (p, l) in zip(prediction, label) if l != -100]
12        for prediction, label in zip(predictions, labels)
13    ]
14
15    results = metric.compute(predictions=true_predictions, references=true_labels)
16    return {
17        "precision": results["overall_precision"],
18        "recall": results["overall_recall"],
19        "f1": results["overall_f1"],
20        "accuracy": results["overall_accuracy"],
21    }
Before starting the fine-tuning, define your TrainingArguments() to access all the points of customization during training:
1args = TrainingArguments(
2    f"task-{task}",
3    evaluation_strategy='epoch',
4    learning_rate=2e-5,
5    per_device_train_batch_size=batch_size,
6    per_device_eval_batch_size=batch_size,
7    num_train_epochs=1,
8    weight_decay=0.01,
9    save_strategy='epoch',
10    logging_strategy='epoch',
11    logging_dir='./logs'
12)
The Trainer class gives an API for feature-complete training in PyTorch for most common use cases. Enter the parameters necessary for training and evaluation:
1trainer = Trainer(
2    model=model,
3    args=args,
4    train_dataset=tokenized_datasets['train'],
5    eval_dataset=tokenized_datasets['validation'],
6    data_collator=data_collator,
7    tokenizer=tokenizer,
8    compute_metrics=compute_metrics,
9)
Here’s the full code for you to run:
1from transformers import (AutoModelForTokenClassification, DataCollatorForTokenClassification,
2                          Trainer, TrainingArguments)
3from datasets import load_dataset, load_metric
4
5task = "ner"
6label_list = dataset['train'].features['ner_tags'].feature.names
7id2label = {idx:label for idx, label in enumerate(label_list)}
8label2id = {label:idx for idx, label in id2label.items()}
9label_all_token = True
10
11data_collator = DataCollatorForTokenClassification(tokenizer)
12metric = load_metric('seqeval')
13model = AutoModelForTokenClassification.from_pretrained('roberta-base', num_labels=len(label_list), id2label=id2label, label2id=label2id, finetuning_task=task)
14batch_size = 10
15
16
17def compute_metrics(p):
18    predictions, labels = p
19    predictions = predictions.argmax(axis=2)
20
21    # Remove ignored index (special tokens)
22    true_predictions = [
23        [label_list[p] for (p, l) in zip(prediction, label) if l != -100]
24        for prediction, label in zip(predictions, labels)
25    ]
26    true_labels = [
27        [label_list[l] for (p, l) in zip(prediction, label) if l != -100]
28        for prediction, label in zip(predictions, labels)
29    ]
30
31    results = metric.compute(predictions=true_predictions, references=true_labels)
32    return {
33        "precision": results["overall_precision"],
34        "recall": results["overall_recall"],
35        "f1": results["overall_f1"],
36        "accuracy": results["overall_accuracy"],
37    }
38
39
40args = TrainingArguments(
41    f"task-{task}",
42    evaluation_strategy='epoch',
43    learning_rate=2e-5,
44    per_device_train_batch_size=batch_size,
45    per_device_eval_batch_size=batch_size,
46    num_train_epochs=1,
47    weight_decay=0.01,
48    save_strategy='epoch',
49    logging_strategy='epoch',
50    logging_dir='./logs'
51)
52
53
54trainer = Trainer(
55    model=model,
56    args=args,
57    train_dataset=tokenized_datasets['train'],
58    eval_dataset=tokenized_datasets['validation'],
59    data_collator=data_collator,
60    tokenizer=tokenizer,
61    compute_metrics=compute_metrics,
62)
63
64
This should download the weights for the `roberta-base` model as well as the dataset builder script.
Training the NER Model
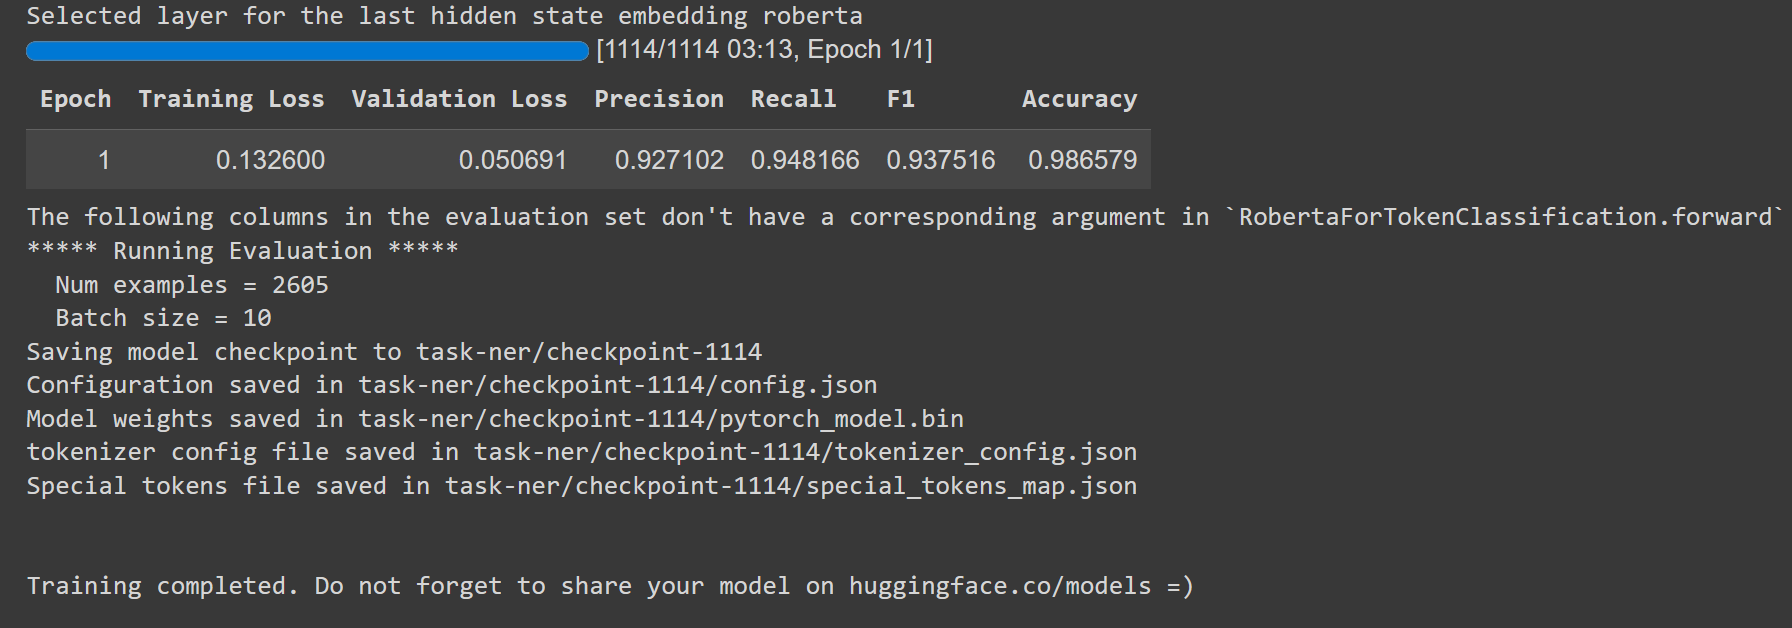
Complete the training pipeline using a standard PyTorch setup. While training, Galileo logs the current epoch and splits.
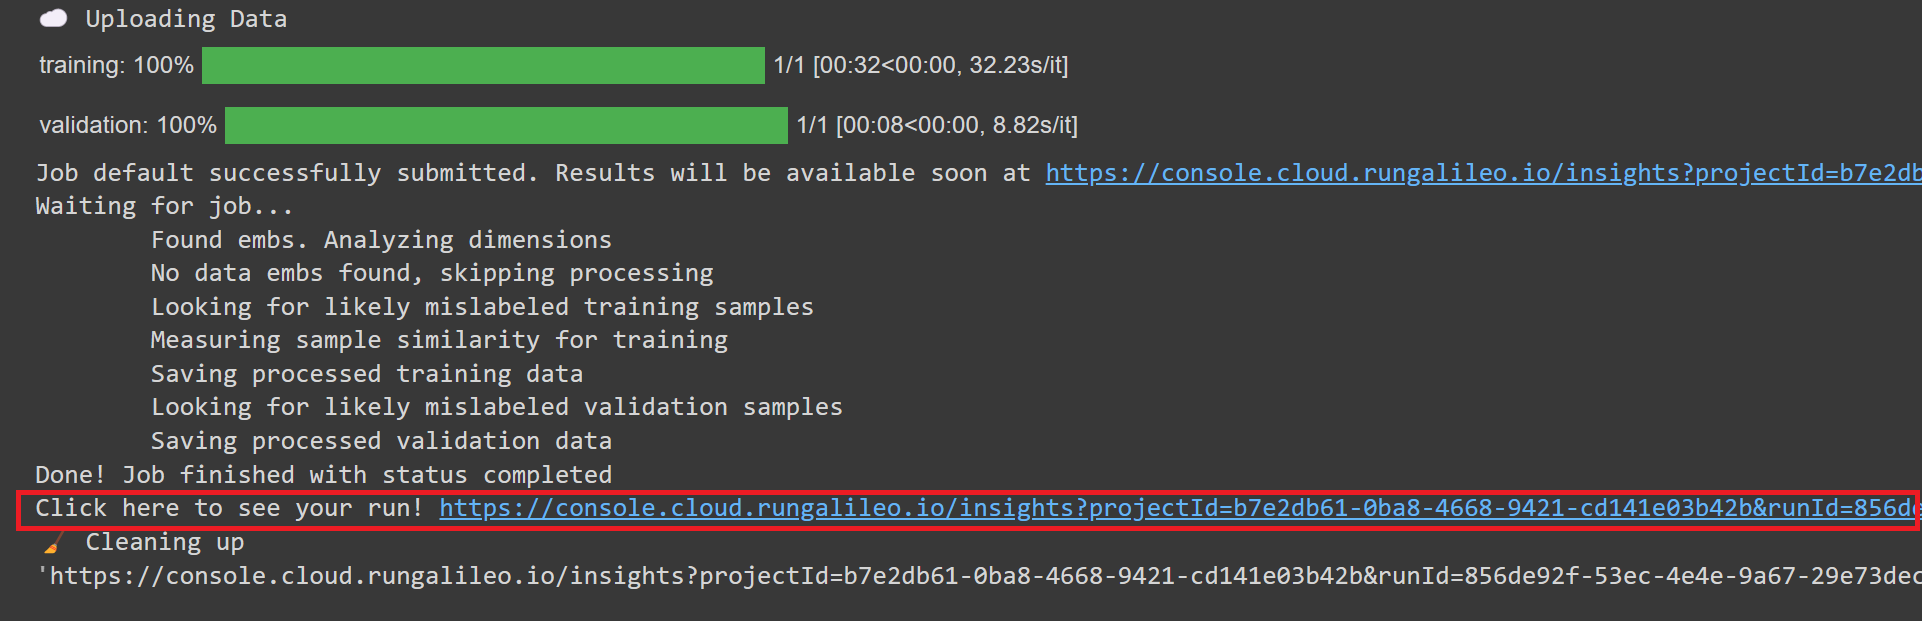
Call `dq.finish()` after training to complete the logging:
1from dataquality.integrations.transformers_trainer import watch
2
3# 🔭🌕 Galileo Logging
4watch(trainer)
5
6trainer.train()
7
8# 🔭🌕 Galileo Logging
9dq.finish()
When training begins, you should see a similar output:

You should see a similar output once training completes:

`dq.finish()` ensures your training and validation samples, embeddings, and model scores are all logged to Galileo. You should also be provided with a link to your run and project details in the Galileo console. Click on that link:
Inspect the training run in Galileo
Head over to the Galileo console, and you should see a similar interface showing you the project name and the data insights on your NER task:

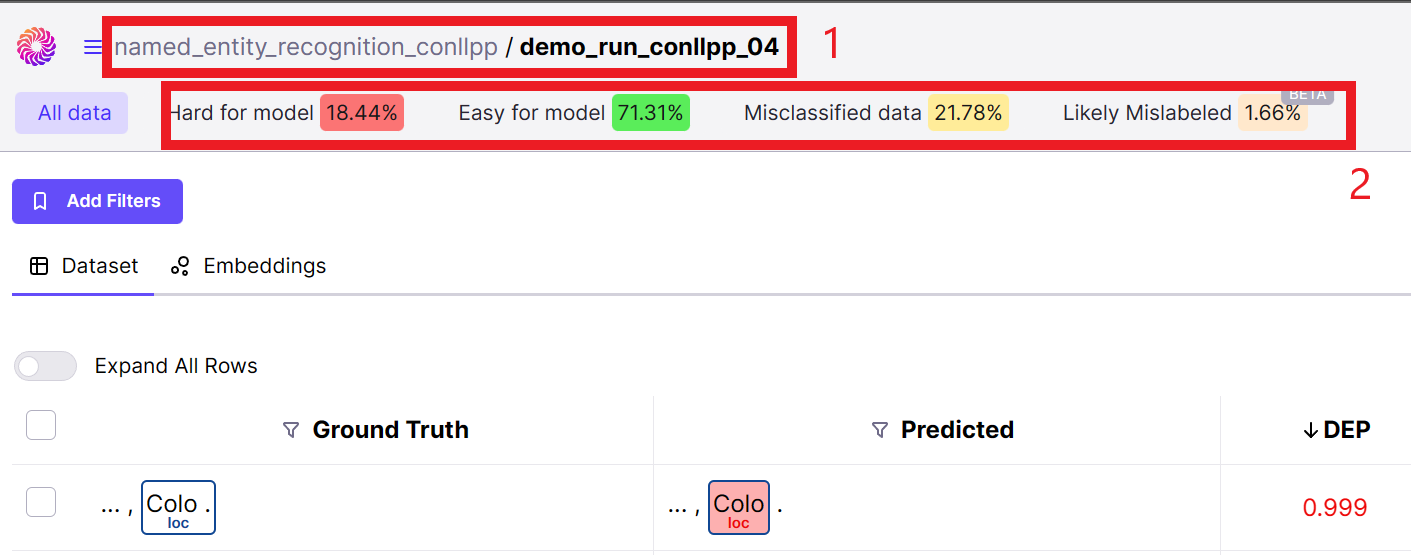
1. Ensure you are in the correct project folder with the run name you specified in your code for this project.
2. You can see high-level summary statistics of your data and model performance, given Galileo's evaluation.
Galileo gives you insights into your data not just at the high level, but also on specific data points, so you can analyze the quality of your data with respect to how your model performs on each data point. The DEP score is Gailieo’s signature score for identifying samples in the dataset that contribute to low or high model performance.
Learn more about how the DEP score is calculated under the hood on this page:

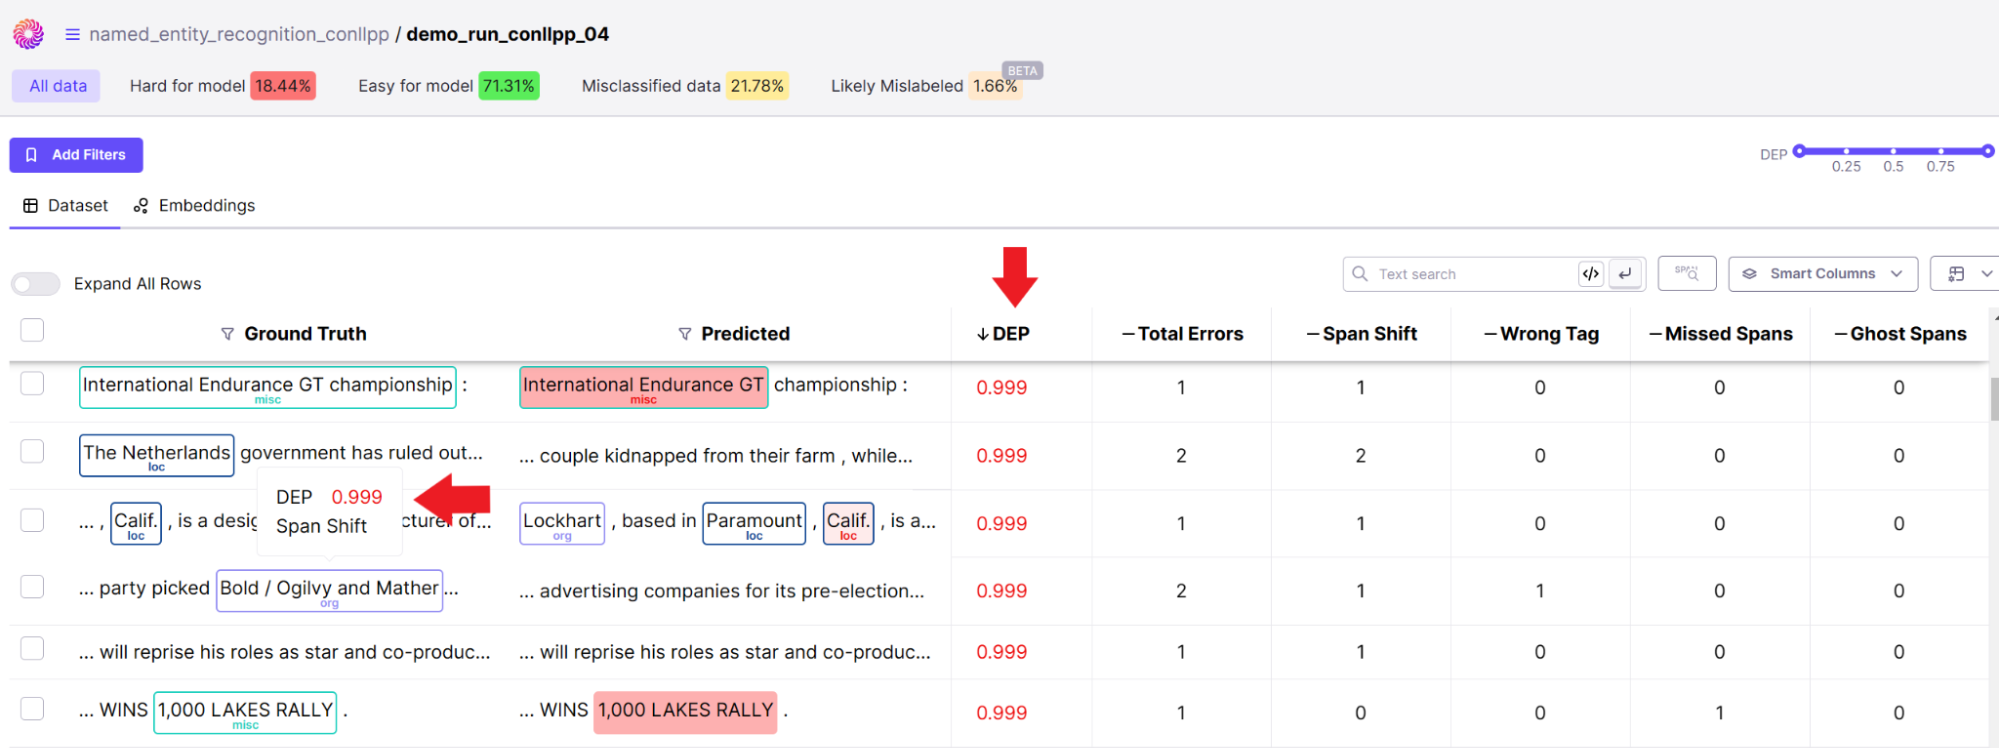
You should also see insights on NER errors such as wrong tags and confusing spans for the model.
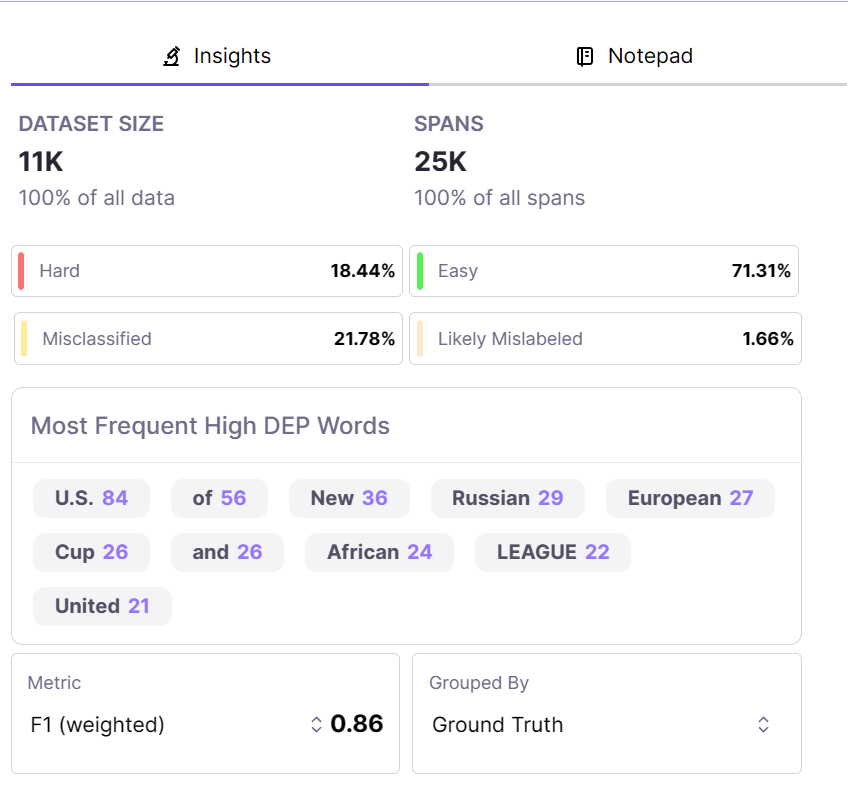
On the right-hand side of your console, you should see other insights that highlight some of the words that were frequently mistagged or confused with another tag by your model so you and your team can take actionable steps to rectify them:

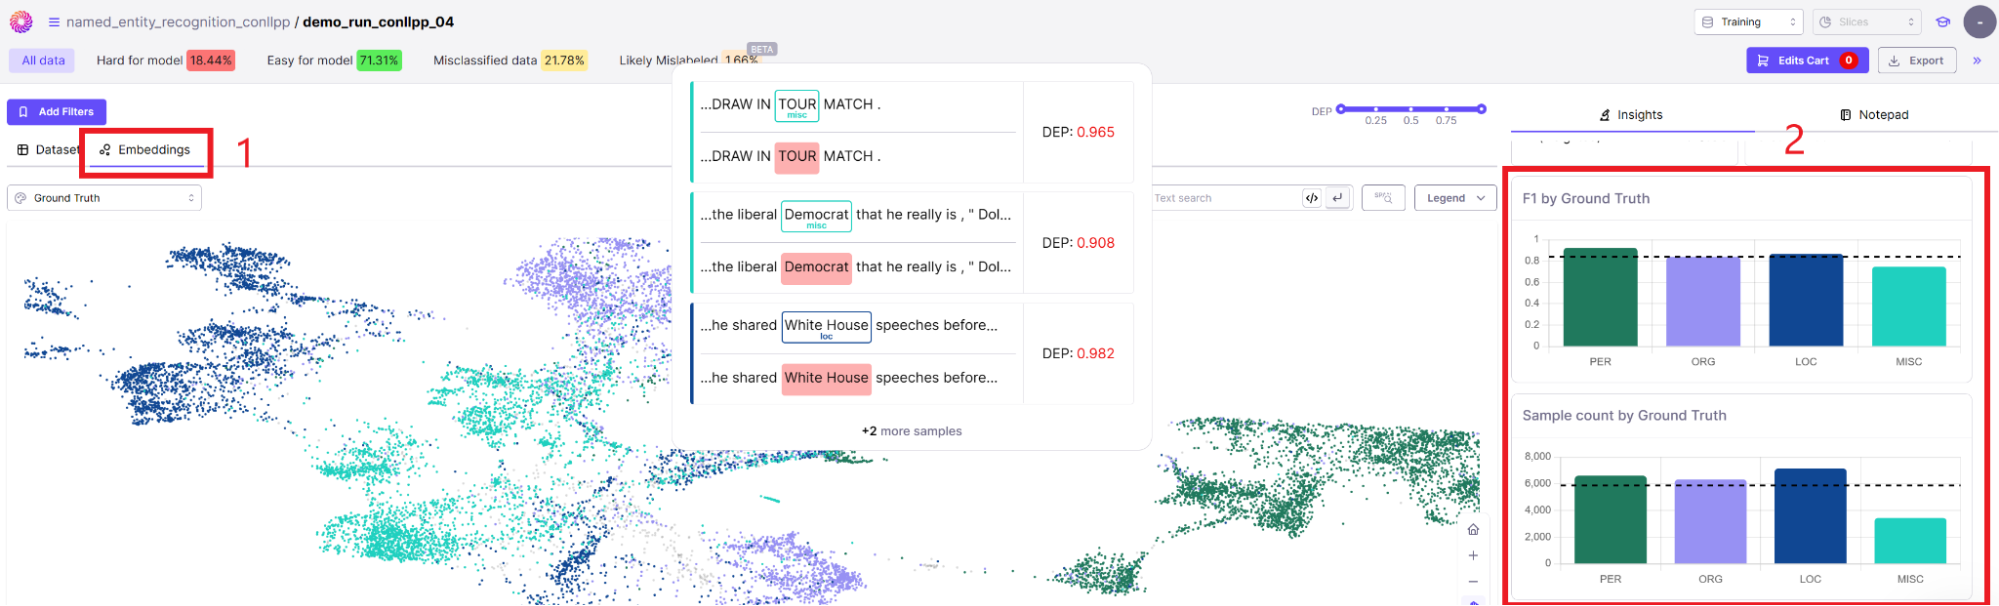
Galileo gives you an embedding view of your data point so that you can look at the performance of the model based on clusters (1). Galileo also lets you look at the model's performance metrics on specific tags and compare performance to ground-truth through detailed visualizations (2):

Next steps
In this article, we covered how to fine-tune a model for NER tasks using the powerful HuggingFace library and then use Galileo to inspect the quality of the model and dataset.
You learned how to:
- Integrate the `dataquality` library from Galileo with HuggingFace,
- Load an HuggingFacedataset,
- Fine-tune a pretrained BERT model,
- Log the results and data to Galileo,
- And finally inspect the quality and performance of your data and model in the Galileo console.
Check out Galileo’s documentation for all the NER console features and see how many of them you find helpful.
Working with Natural Language Processing?
Read about Galileo’s NLP Studio
